Honey Garlic Chicken – Easy 15-Minute Weeknight Dinner
Table of Contents
Some recipes justify their existence through complexity — intricate techniques, long ingredient lists, hours of careful attention that produce something genuinely extraordinary. And then there are the recipes that justify their existence through sheer, reliable practicality — the ones that feed your family a genuinely delicious, restaurant-quality meal on a Tuesday night when you have 15 minutes and approximately zero energy left for anything complicated.
Thank you for reading this post, don't forget to subscribe!This Honey Garlic Chicken is emphatically the second kind. Five ingredients. Fifteen minutes. One skillet. And a sticky, glossy, sweet-savory glaze that coats every piece of tender chicken in something so good that even the pickiest eaters at the table finish their plate and ask what’s for dinner tomorrow in a tone that clearly means they hope the answer is this again.
The flavor profile is the kind of balance that makes simple food genuinely compelling — natural honey brings sticky sweetness that caramelizes beautifully in the hot pan, low-sodium soy sauce adds the salty, umami depth that grounds all that sweetness, fresh garlic contributes sharp, pungent aromatic warmth, and an optional pinch of red pepper flakes introduces just enough heat to keep every bite interesting without overwhelming the fundamental sweetness that makes this dish so broadly appealing. It’s Asian-inspired comfort food at its most accessible — a flavor combination that works for adults who want complexity and children who want something sweet and savory with rice.
This is the easy honey garlic chicken recipe that earns a permanent spot in your weeknight rotation from the very first time you make it.
Ingredient Essentials and Smart Substitutions
Core Protein Options
Boneless skinless chicken breasts, cut into small cubes, are the standard protein for this honey garlic chicken recipe and produce the leanest, cleanest result. The cubing is deliberate and important — small pieces mean dramatically more surface area in contact with the hot pan, more caramelization per piece, and a cooking time fast enough to fit the 15-minute total promise without cutting corners on quality.
Boneless skinless chicken thighs are the richer, more forgiving alternative. Their higher fat content means they stay moist and tender even if the cooking runs slightly longer than planned — a meaningful advantage for home cooks who are simultaneously managing a side dish, answering a question from a child, and trying to set the table. Thighs require a slightly longer cooking time than breasts to cook through fully, so add 1 to 2 minutes to the finishing simmer stage and verify the internal temperature reaches 165°F before serving.
The 4-Ingredient Honey Garlic Glaze
This is the sauce that makes everything work — deceptively simple, genuinely extraordinary, and reproducible from pantry staples in 60 seconds.
Pure honey is the foundation — its natural sugars caramelize against the hot chicken surface, creating the sticky, lacquered glaze that makes honey garlic chicken so visually appealing and so satisfying to eat. Use real honey rather than honey-flavored syrups or blends for the best flavor and caramelization behavior. Low-sodium soy sauce balances the sweetness with salty, fermented depth — the low-sodium variety is specified because the glaze reduces and concentrates during cooking, amplifying whatever sodium was present in the starting sauce. Freshly minced garlic — 3 to 4 cloves minimum — provides the aromatic punch that gives this recipe its name and its character. Pre-minced jarred garlic works as a convenience substitute but fresh delivers noticeably more vibrant flavor in a recipe this simple. Red pepper flakes are optional but recommended — they add a background warmth that prevents the dish from tasting one-dimensionally sweet and makes the overall flavor profile more adult and interesting.
Dietary Adjustments
Gluten-Free: Substitute tamari for soy sauce at a 1:1 ratio. Tamari is naturally brewed without wheat and produces a result that is functionally identical in flavor and behavior to soy sauce — a completely seamless swap that makes this gluten free honey garlic chicken without any other modification.
Heat Variations: Replace standard honey with hot honey — infused with chili peppers during production — for a spicy honey garlic chicken that builds heat progressively as the glaze reduces. Alternatively, a drizzle of sriracha added to the sauce mixture introduces vinegary heat and a slightly different spice character that works beautifully against the sweet honey base.
Soy-Free: A reader-contributed alternative for soy-free households uses a combination of fresh lemon juice and a pinch of salt in place of soy sauce — the lemon provides acidity and brightness that partially replicates the balancing role of soy without any soy-derived ingredients. The flavor profile shifts toward a sweeter, citrusy result rather than the umami-forward original, but it’s a genuinely workable adaptation for households managing soy allergies.
Preparation Strategy: The Speed Hacks
The Cubing Secret
The single most important prep decision in this quick honey garlic chicken recipe is how the chicken is cut. ½-inch cubes — uniform, small, and consistent — are the target. At this size, the chicken cooks through completely in 7 to 9 minutes total, each piece develops meaningful caramelization on multiple sides during the initial sear, and the finished pieces are perfectly bite-sized for serving over rice or noodles without requiring any cutting at the table. Larger pieces take longer to cook through, develop less surface caramelization per bite, and risk leaving the center undercooked while the exterior has already finished. Cut small, cut uniform, and the rest of the recipe takes care of itself.
Meal Coordination: Start Your Sides First
The 15-minute total time for this honey garlic chicken recipe assumes your side dish is either already done or can be ready simultaneously. Brown rice, which takes 40 to 45 minutes to cook, should be started well before the chicken prep begins. White rice at 18 to 20 minutes should go on when you start cutting the chicken. Quinoa at 15 minutes can start simultaneously with the chicken cooking. Cauliflower rice or thin noodles can be prepared in the final minutes of the chicken’s simmering stage. Planning the sequence of your sides before you pick up the knife is the small planning habit that makes the 15-minute promise achievable in real kitchen conditions rather than just on a recipe card.
Pre-Mixing: Work Smarter at the Stove
While the chicken is browning in the skillet — during those initial 3 to 4 minutes when it doesn’t need constant attention — whisk the honey, soy sauce, minced garlic, and red pepper flakes together in a small bowl and have it ready to pour. This pre-mixing serves two purposes: it ensures the sauce components are fully integrated before they hit the hot pan (preventing pockets of raw garlic or uneven honey distribution), and it means the critical glazing step happens instantly at exactly the right moment rather than being delayed while you measure and combine at the stove. In a 15-minute recipe, having the sauce ready to go saves meaningful time.
The Cooking Process: Step-by-Step
Step 1: Searing for Color and Flavor
Heat 1 to 2 tablespoons of neutral oil — vegetable, avocado, or canola — in a large skillet or wok over medium-high heat until the oil is shimmering and just beginning to smoke at the edges. Season the cubed chicken with salt and black pepper. Add the chicken to the hot pan in a single layer — if your pan isn’t large enough to fit all the chicken without crowding, cook in two batches rather than piling pieces on top of each other. Crowding the pan traps steam and prevents browning, producing pale, steamed chicken rather than the golden, caramelized sear that adds flavor and visual appeal.
Cook without stirring for 3 to 4 minutes until the bottom faces are deeply golden and the chicken releases easily from the pan surface without sticking. The Maillard reaction happening on those cut surfaces — the caramelization of the chicken’s surface proteins and sugars — is building the flavor foundation that the honey garlic glaze will amplify and complete.
Step 2: Glazing
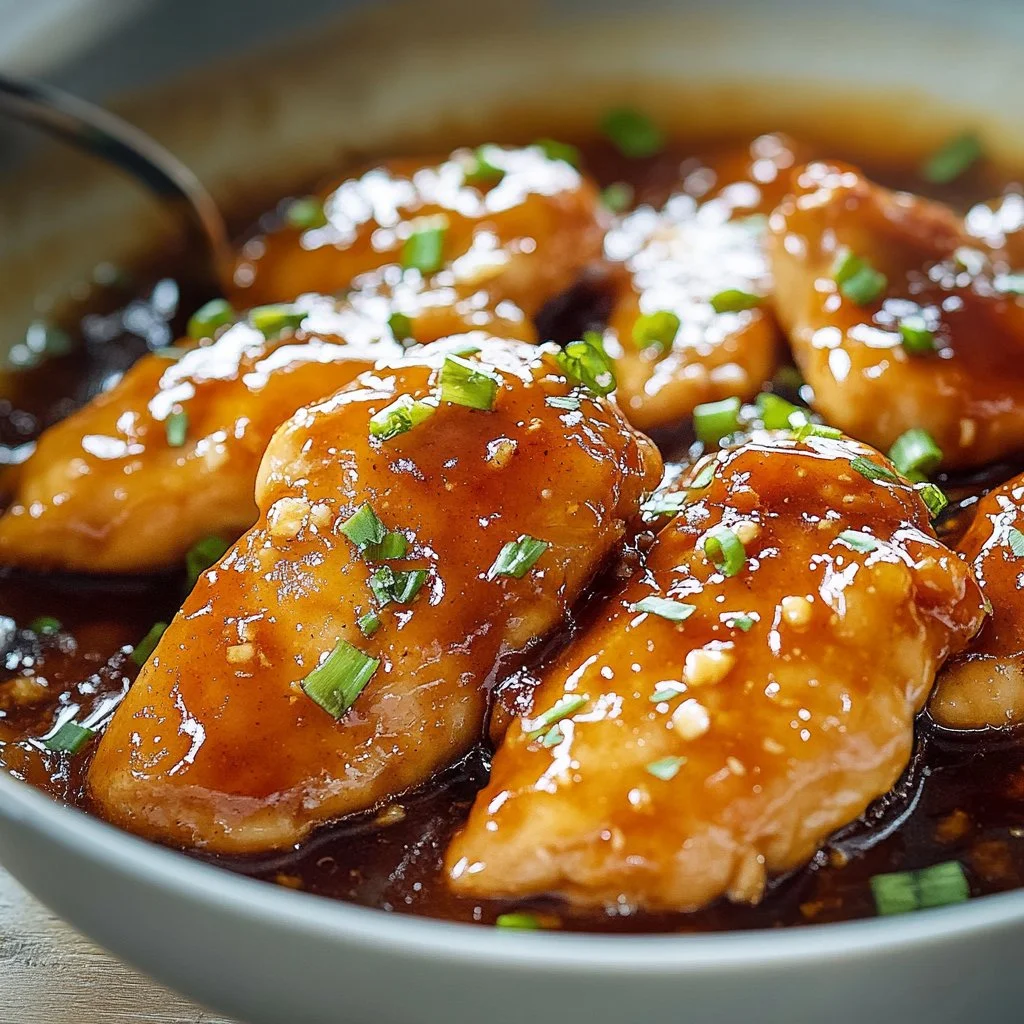
Using tongs or a spatula, turn the chicken pieces to expose the uncooked sides to the pan surface. Immediately pour the pre-mixed honey garlic sauce over the chicken in the skillet. The sauce will bubble and spit vigorously on contact with the hot pan — this is expected and correct. Use a spatula or wooden spoon to toss the chicken in the sauce until every piece is evenly coated and the sauce is beginning to reduce and caramelize against the chicken surfaces.
Step 3: Finishing Simmer
Reduce the heat slightly to medium and continue cooking for an additional 4 to 5 minutes, stirring occasionally, until the sauce has reduced to a thick, sticky, glossy glaze that clings to every piece of chicken and the chicken is cooked through to an internal temperature of 165°F. Watch the small chicken cubes carefully during this stage — their small size means the window between perfectly cooked and overcooked and dry is narrow. Pull the pan from heat the moment the chicken is done and the sauce has achieved that sticky, lacquered consistency. Overcooked small chicken cubes lose moisture rapidly and cannot be rescued once dry.
Pro-Tips for an Enhanced Result
The Double Sauce Rule
If you’re serving this easy honey garlic chicken over rice, noodles, or vegetables, strongly consider doubling the sauce quantity from the base recipe. The single-batch sauce is perfectly calibrated to glaze and coat the chicken pieces themselves — but when that glazed chicken is placed over a bed of rice, the rice absorbs the sauce rapidly, leaving less for the actual eating experience. Double sauce means generous drizzling liquid over every bowl, deeply flavored rice, and the kind of saucy, restaurant-style presentation that makes this dish feel abundant and satisfying rather than dry and measured.
Thickening Technique: The Cornstarch Fix
If your sauce is thinner than desired after the full simmering time — which can happen with particularly juicy chicken that releases more moisture than expected — the fix is simple and fast. Mix 1 to 3 teaspoons of cornstarch with 1 tablespoon of cold water in a small bowl until completely smooth, then pour the slurry into the simmering sauce in the final 2 minutes of cooking while stirring continuously. The cornstarch thickens almost immediately in the hot sauce, transforming a thin, watery glaze into something thick, sticky, and restaurant-quality. Start with 1 teaspoon and add more if needed — it’s easier to add than to thin back out.
Texture Variations Worth Trying
Air Fryer Method: For crispy honey garlic chicken with a contrasting crunchy exterior, coat the raw chicken cubes in panko breadcrumbs and air fry at 400°F for 10 to 12 minutes until golden and crispy. Warm the prepared sauce separately in a small saucepan and toss the crispy air-fried chicken in the warm glaze immediately before serving. The textural contrast between the crunchy exterior and the sticky, sweet glaze is extraordinary and makes this feel like a completely different — and equally excellent — dish.
Cornstarch Coating: For a slightly thicker, tacky exterior on the stovetop version, toss the raw chicken cubes in 2 to 3 tablespoons of cornstarch before cooking, shaking off any excess. The cornstarch coating creates a slightly crispier surface during the initial sear and produces a thicker, more adhesive glaze that clings to the chicken more aggressively than the uncoated version. This is the technique used in many Chinese-American restaurant versions of honey garlic chicken and produces a noticeably different texture that many home cooks prefer.
Complete Meal Coordination and Serving
Base Options
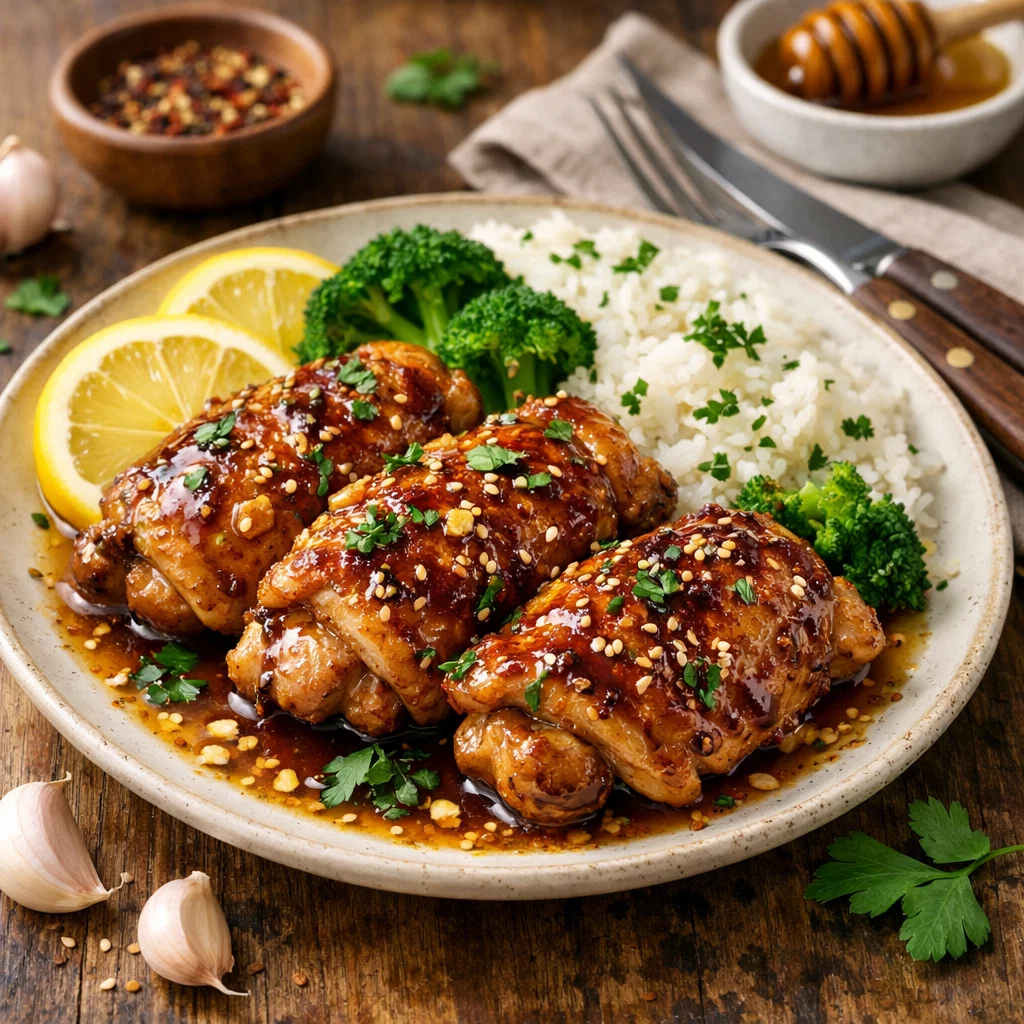
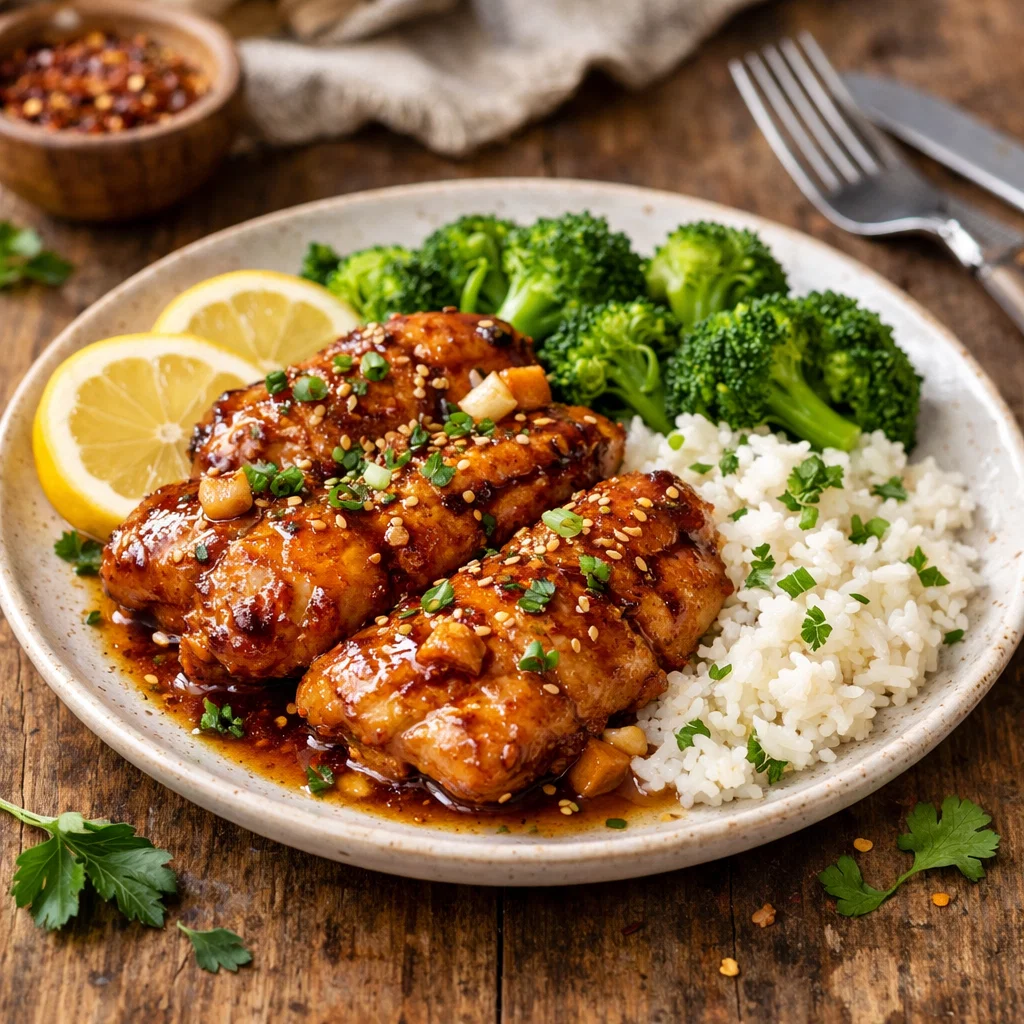
The sticky, deeply flavored honey garlic chicken glaze is designed to be served over something that absorbs and complements it. White rice is the classic and most common pairing — its mild, neutral flavor provides the perfect backdrop for the sweet-savory glaze. Brown rice adds nutty flavor and fiber for a more nutritionally complete meal. Quinoa is the highest-protein grain base option and provides a slightly textured result that contrasts interestingly with the tender chicken. Cauliflower rice is the low-carb alternative that keeps the dish light without sacrificing the vessel for the sauce. Thin rice noodles or soba noodles create a more noodle-bowl character that works beautifully for a different presentation of the same dish.
Vegetable Pairings
Steamed broccoli is the community’s unanimous favorite pairing for honey garlic chicken — the florets absorb the glaze that drips from the chicken, the slight bitterness of the broccoli cuts through the sweetness of the honey, and the color contrast makes every bowl look genuinely appealing. Green beans, snap peas, and bok choy all work on the same principle — brief cooking, slight bite remaining, and a fresh vegetable character that balances the richness of the glaze. Marinated cucumbers dressed with rice vinegar and sesame oil served cold alongside the hot chicken create a refreshing contrast that makes the overall meal feel more dynamic and considered.
Garnish for Impact
For crunch: Scatter chopped peanuts or cashews over each serving for buttery, protein-rich crunch that adds textural contrast to the sticky glazed chicken. Toasted sesame seeds add a more delicate nutty crunch and a visual finish that makes the dish look professionally styled.
For freshness: Thinly sliced green onions add sharp, fresh bite that cuts through the sweetness. Fresh cilantro adds herby brightness for those who enjoy it. A fresh squeeze of lime juice over each finished bowl is the single most effective finishing touch in this recipe — the citrus acidity cuts through the honey sweetness, brightens all the other flavors, and makes the entire dish taste more alive and complex than it did without it.
Storage and Reheating
Shelf Life
Store leftover honey garlic chicken in an airtight container in the refrigerator for up to 4 to 5 days. The glaze firms up considerably during refrigeration as the honey and reduced sauce cools — this is normal and reverses completely during reheating. The flavor actually improves slightly after the first day as the garlic and honey continue to meld.
Reheating Tip
The most important storage and reheating rule for easy honey garlic chicken is to always store and reheat the chicken together with the sauce rather than separately. The sauce is not just a flavoring — it’s the moisture barrier that keeps the small chicken cubes from drying out during storage and reheating. Chicken stored without its sauce dries out quickly in the refrigerator and reheats into something tough and unpleasant. Chicken stored in the sauce stays moist, flavorful, and nearly indistinguishable from freshly made when reheated gently in a skillet over medium-low heat with a splash of water or additional soy sauce to loosen the thickened glaze, or in the microwave at 70% power in 90-second intervals until warmed through.