Broccoli Cheese Casserole
Table of Contents Broccoli Cheese Casserole
Every family that grew up in the 1980s has a version of this memory: a glass baking dish emerging from the oven at Thanksgiving or Christmas, filled with broccoli swimming in a sauce the color of a traffic cone, topped with something that may or may not have qualified as a breadcrumb, the whole thing bound together by a half-melted block of Velveeta that someone had cubed directly into the dish. It was, by every objective measure of sophisticated cooking, not a refined dish. And yet it was also — and this is the part that matters — genuinely beloved. People went back for seconds. Children who claimed to hate vegetables ate it. The dish earned its place at the holiday table through sheer, undeniable crowd-pleasing power.
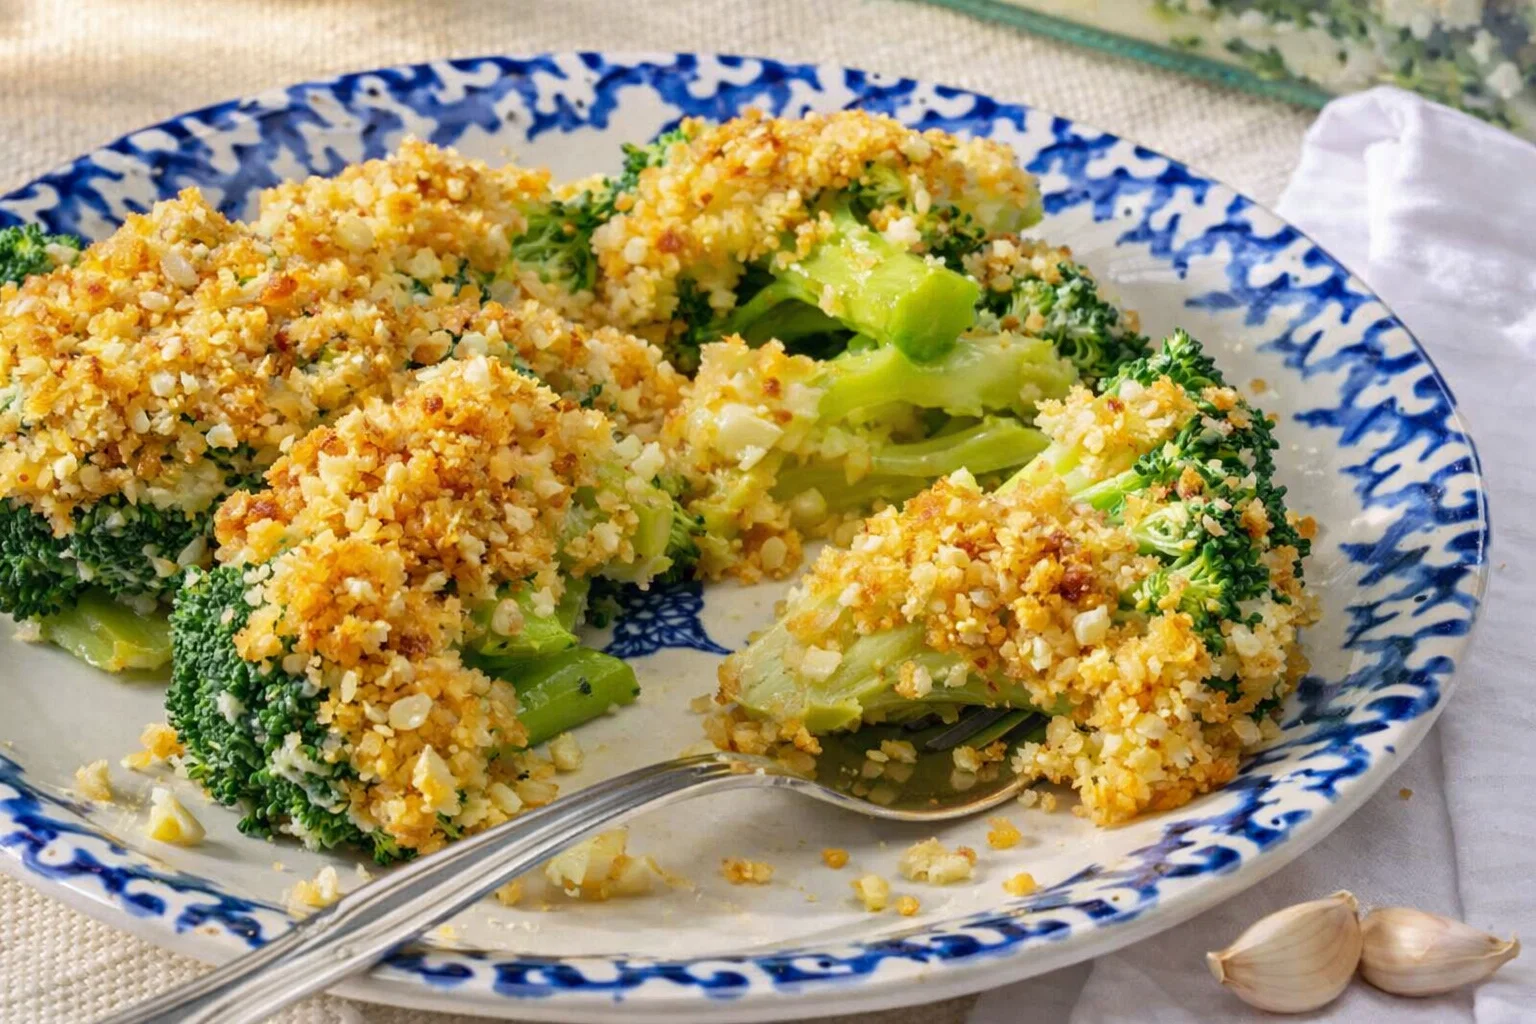
Thank you for reading this post, don't forget to subscribe!This Broccoli Cheese Casserole honors that legacy and then significantly improves upon it. The neon orange sauce gives way to a homemade mornay — a classic roux-based cheese sauce made with whole milk and properly aged sharp cheddar that delivers more complex, more nuanced flavor than any processed cheese product can approach. The mushy, overcooked broccoli gives way to precisely blanched florets and stems that retain their color, their slight bite, and their structural integrity beneath the sauce. The soggy topping gives way to pre-toasted buttery panko that arrives at the table golden and genuinely crispy rather than softened from steam.
The result is a homemade broccoli cheese casserole that satisfies the nostalgic craving while tasting like the version a trained cook would serve — elevated enough for a sophisticated holiday table, comforting enough to make everyone feel like they are home.
Broccoli Cheese Casserole

Why This Version Wins
Flavor Depth: Real Aged Cheddar
The most transformative single change in this easy broccoli cheese casserole is the replacement of processed cheese with properly aged sharp or extra-sharp cheddar. Processed cheese — Velveeta and its equivalents — melts smoothly and produces a consistent, uniform sauce, but it contributes very little actual cheese flavor. Its taste is mild, slightly salty, and one-dimensional. Aged cheddar, by contrast, has undergone months of enzymatic activity that produces a complex array of flavor compounds — the result is a cheese with genuine sharpness, pronounced umami depth, and a slightly crystalline richness that makes the finished cheesy broccoli casserole taste like it was made with intention and quality rather than convenience and nostalgia.
Texture Mastery: Blanch and Shock
The best broccoli cheese casserole has broccoli that is tender but not mushy — cooked enough to yield pleasantly to a fork while retaining enough structural integrity to hold its shape beneath the sauce and the panko topping. This requires a precise blanching and shocking technique rather than simply dumping raw broccoli into a casserole dish and trusting the oven to cook it through — which produces the uneven, frequently mushy broccoli that gives this dish a bad reputation in its lesser versions.
Zero-Waste Cooking: Don’t Discard the Stems
Most Broccoli Cheese Casserole recipes instruct the cook to use florets only and discard the stems — an approach that wastes approximately a third of the vegetable and eliminates some of the most texturally interesting parts of the broccoli. The stems have a firm, slightly denser texture than the florets and a clean, mild broccoli flavor — prepared correctly they are excellent in this dish and add textural variety that makes every bite more interesting. The zero-waste approach also means more broccoli cheese casserole from the same amount of produce purchased.
Superior Crunch: Pre-Toasted Panko
Panko breadcrumbs toasted in butter before they go on the casserole arrive at the table with a guaranteed, consistent golden crunch regardless of how much steam the baking dish generates during cooking. Standard breadcrumb toppings applied raw depend entirely on oven conditions and steam management for their crispness — they frequently emerge soggy, pale, and unappealing despite looking promising going into the oven. Pre-toasted panko has already achieved its ideal color and crunch before baking begins — the oven simply warms it and integrates it with the cheese layer beneath.
Technique Deep-Dive: Better Broccoli Preparation
Stem-to-Floret Prep
Begin by separating the broccoli into its component parts — florets and stems — for preparation rather than treating the whole head as a single unit.
For the stems: Trim the dry, tough bottom end of each main stem. Using a sharp vegetable peeler or paring knife peel away the tough fibrous outer layer — approximately ⅛ inch thick — to reveal the pale, tender inner stem beneath. This outer layer is genuinely too fibrous to eat pleasantly and peeling it reveals a stem that is mild and tender. Slice the peeled stems crosswise into ½-inch coins — uniform thickness ensures even cooking during the blanching step.
For the florets: Cut the broccoli head into bite-sized florets approximately 1 to 1.5 inches each — uniform sizing ensures even cooking. Keep a small amount of the thinner stem attached to each floret as a natural handle.
Staggered Boiling: The Timing Secret
Because the stems are denser and more fibrous than the florets they require more cooking time to reach the same level of tenderness. Stagger the boiling to compensate: bring a large pot of well-salted water to a rolling boil and add the stem coins first. Boil for 3 minutes before adding the florets to the same pot — then continue cooking both together for an additional 2 minutes. This 3-minute head start for the stems means both components reach ideal tenderness simultaneously and can be shocked and drained together.
The Quick-Shock Shortcut
After blanching transfer the broccoli immediately to a colander in the sink. Rather than preparing a large ice bath — which requires a significant quantity of ice and a large bowl — use the quick-shock shortcut: add a handful of ice cubes directly to the colander with the broccoli and run cold tap water over the top continuously for 2 minutes. The combination of the ice and the cold running water drops the broccoli temperature rapidly enough to stop the cooking process and lock in the bright green color and the slightly firm texture. Allow to drain thoroughly — pat completely dry before adding to the casserole dish, as water on the broccoli will thin the mornay sauce.
The Sauce Secret: Homemade Mornay
The Upgrade From Processed Cheese
A mornay sauce is simply a classic French béchamel — a flour-thickened milk sauce — with cheese melted into it. It is the correct sauce for a sophisticated Broccoli Cheese Casserole bake because its roux base gives it body and stability that processed cheese cannot replicate, its milk base provides a cleaner, more delicate creaminess than processed cheese’s manufactured texture, and its aged cheddar component contributes genuine, complex cheese flavor in every bite.
Building the Mornay: Step by Step
The nutty roux: In a medium saucepan melt 2 tablespoons unsalted butter over medium heat. Once the butter is fully melted and slightly foaming add 2 tablespoons all-purpose flour all at once. Whisk continuously for 1 to 2 minutes until the flour is fully incorporated and the mixture smells slightly nutty — this cooking of the roux eliminates the raw flour taste that produces the gluey, starchy quality in under-cooked sauces.
Whisking in the milk: Add the 2 cups whole milk in a slow, steady stream while whisking continuously — adding all the milk at once causes lumping. Whisk without stopping until the sauce comes to a gentle simmer and has thickened enough to coat the back of a spoon — approximately 5 to 7 minutes over medium heat. The continuous whisking is essential for a smooth, lump-free result.
Melting in the cheddar: Remove the thickened sauce from heat. Add 1½ cups freshly shredded aged sharp cheddar in two additions — stirring gently after each addition until completely melted before adding the next. Adding the cheese off heat prevents the proteins from seizing and producing a grainy texture. Season with salt, black pepper, and a pinch of nutmeg — nutmeg is the classic mornay seasoning that amplifies the dairy richness without being detectable as a specific flavor.
The Ultimate Crunch: Pre-Toasted Panko
The Toasting Technique
In a medium skillet melt 2 tablespoons unsalted butter over medium heat until foaming. Add ¾ cup panko breadcrumbs and stir continuously to coat every crumb in the foaming butter. Continue stirring and toasting over medium heat for 3 to 4 minutes until the panko is an even, deep golden brown and smells toasty and nutty. Remove from heat immediately — the carry-over heat of the pan will continue cooking the panko briefly after removal and it can go from golden to burnt very quickly. Season lightly with salt. Transfer to a plate to cool and stop the cooking. The pre-toasted panko should be used within 30 minutes of toasting for the maximum crunch.
Step-by-Step Assembly and Baking
Preparing the Baking Dish
Preheat the oven to 400°F (200°C). Grease a 2-quart baking dish (approximately 8×8 inches or equivalent) with butter or cooking spray. Place the completely drained and dried blanched broccoli — florets and stem coins — in the prepared dish in an even layer. Season the broccoli directly with salt and freshly ground black pepper before adding the sauce — seasoning only the sauce and not the broccoli itself produces an unevenly seasoned dish where the broccoli tastes flat against the richly seasoned sauce.
Layering for Maximum Flavor
First layer: Pour the warm mornay sauce evenly over the seasoned broccoli — use a spatula to ensure the sauce reaches the edges and settles into the spaces between the florets.
Second layer: Scatter ½ cup additional freshly shredded sharp cheddar directly over the mornay sauce — this second cheese layer melts during baking and creates a distinct, slightly caramelized cheese layer between the sauce and the panko topping that adds textural complexity and concentrated cheese flavor.
Third layer: Distribute the pre-toasted buttery panko evenly over the entire surface of the cheese layer — from edge to edge with no bare patches. The panko should form a complete, even blanket over the surface.
The Final Bake and Rest
Place the assembled broccoli cheese casserole on the center rack of the preheated oven. Bake for 20 minutes until the sauce is bubbling actively at the edges, the cheese layer is fully melted, and the panko topping is deeply golden. Allow the casserole to rest for 5 to 10 minutes after removing from the oven before serving — the rest period allows the sauce to thicken slightly from its bubbling state and settle into a cohesive, scoopable consistency. Serving immediately from the oven produces a sauce that runs rather than holds.
Post-Recipe Management
Storage
Allow the baked broccoli cheese casserole to cool completely to room temperature — at least 30 to 45 minutes — before covering and refrigerating. Store covered tightly in the refrigerator for 2 to 3 days. The panko topping softens during refrigeration as it absorbs moisture from the sauce — to restore crunch reheat in a 375°F oven for 15 to 20 minutes uncovered rather than in a microwave, which steams the topping and makes it irreversibly soggy. A brief additional toast under the broiler for the final 2 minutes restores the panko crunch almost completely.
Nutritional Breakdown
| Nutrient | Amount Per Serving (Based on 6 Servings) |
|---|---|
| Calories | 320 kcal |
| Total Fat | 20g |
| Saturated Fat | 12g |
| Protein | 14g |
| Carbohydrates | 22g |
| Dietary Fiber | 3g |
| Total Sugars | 6g |
| Sodium | 480mg |
| Vitamin C | 85mg (95% Daily Value — broccoli is one of the most concentrated food sources of Vitamin C available) |
| Calcium | 320mg |
All nutritional values are estimates and will vary based on specific ingredient brands, cheese quantity, and portion sizes.